Introduction to Samba File Sharing
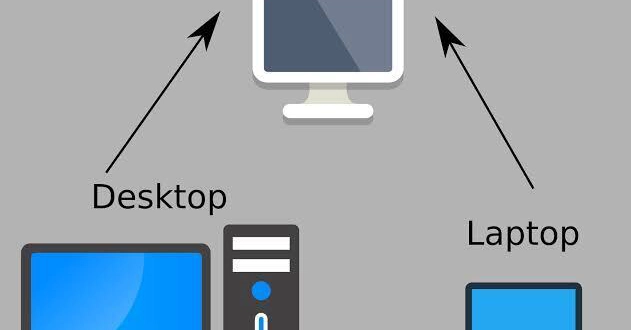
Moving files between Linux and Windows machines on a local network shouldn't require a USB drive or complicated FTP setups. Samba, an open-source implementation of the SMB/CIFS network protocol, bridges this gap. It allows Linux systems to act as file servers, appearing as standard network drives to Windows clients, and vice-versa for Linux clients accessing Windows shares. This means users can open, save, and edit files across different operating systems without direct terminal interaction on the remote machine. This guide walks through setting up both a completely open, guest-accessible share and a more secure, authenticated share on a Debian-based Linux system, and how to access them from a client Linux machine.
Prerequisites
To follow this guide, you will need:
- Two Debian or Ubuntu-based machines. One will serve as the Samba server, and the other will act as a client. Virtual machines work perfectly fine for this setup.
- Basic familiarity with the Linux command line.
- Root or sudo privileges on the server machine.
Installing Samba
First, ensure your package lists are up to date. On the server machine, run:
sudo apt update
Next, install the Samba package:
sudo apt install samba
Once installed, Samba typically starts automatically. You can check its status with:
sudo systemctl status smbd
If it's not running, you can start it with sudo systemctl start smbd and enable it to start on boot with sudo systemctl enable smbd.
Setting Up a Guest (Public) Share
A guest share is ideal for simple file exchange where security is not a primary concern, such as in a home network where all devices are trusted. This setup requires no authentication from clients.
Configuring Samba
The main Samba configuration file is /etc/samba/smb.conf. It's a good practice to back it up before making changes:
sudo cp /etc/samba/smb.conf /etc/samba/smb.conf.bak
Now, open the configuration file for editing:
sudo nano /etc/samba/smb.conf
Scroll to the end of the file and add the following section to define your guest share:
[guest]
    comment = Public Share
    path = /srv/samba/guest
    browseable = yes
    writeable = yes
    guest ok = yes
    read only = no
    create mask = 0777
    directory mask = 0777
Let's break down these options:
[guest]: This is the name of the share that will appear on the network.comment: A brief description of the share.path: The directory on the Linux server that will be shared.browseable = yes: Makes the share visible when browsing the network.writeable = yes: Allows users to write files to the share.guest ok = yes: Permits access without authentication.read only = no: Explicitly allows writing (redundant withwriteable = yesbut good for clarity).create maskanddirectory mask: These set the default permissions for new files and directories created in the share.0777gives full read, write, and execute permissions to everyone.
Creating the Shared Directory
Next, create the directory specified in the path and set appropriate permissions. Since this is a guest share, we'll make it world-writable, but it's crucial to understand the security implications of this approach. For production environments, this is generally not recommended.
sudo mkdir -p /srv/samba/guest
sudo chmod -R 0777 /srv/samba/guest
The -p flag ensures that parent directories are created if they don't exist. The chmod -R 0777 command recursively sets permissions for the directory and its contents, granting full access to all users.
Restarting Samba
After modifying the configuration file, you need to restart the Samba service for the changes to take effect:
sudo systemctl restart smbd
Setting Up an Authenticated Share
An authenticated share requires users to provide valid Linux usernames and passwords to access the shared resources. This is the recommended approach for any sensitive data.
Creating a Dedicated User
For security, it's best to create a specific Linux user for Samba access, rather than using existing system accounts. This user doesn't necessarily need shell access.
sudo useradd -M -s /sbin/nologin sambauser
sudo passwd sambauser
You will be prompted to set a password for sambauser. This password will be used for Samba authentication.
Configuring Samba for Authentication
Add a new section to your /etc/samba/smb.conf file for the authenticated share. Let's call it secure:
[secure]
    comment = Authenticated Share
    path = /srv/samba/secure
    browseable = yes
    writeable = yes
    guest ok = no
    valid users = @smbgroup
    create mask = 0664
    directory mask = 0775
Key options here:
guest ok = no: Disables guest access, enforcing authentication.valid users = @smbgroup: Specifies that only users belonging to the Linux group namedsmbgroupare allowed to access this share.create mask = 0664: Sets permissions for new files. Owner and group can read/write, others can only read.directory mask = 0775: Sets permissions for new directories. Owner and group can read/write/execute, others can only read/execute.
Creating the Shared Directory and Group
Create the directory for the secure share and set its permissions. We'll also create the smbgroup and add our sambauser to it.
sudo mkdir -p /srv/samba/secure
sudo groupadd smbgroup
sudo usermod -aG smbgroup sambauser
Now, set the ownership of the directory to the user and group that will manage it. For this example, we'll use sambauser and smbgroup. However, it's often better to use a less privileged user for day-to-day operations and grant that user write permissions to the directory if needed, or manage permissions via group membership.
sudo chown -R sambauser:smbgroup /srv/samba/secure
sudo chmod -R 0775 /srv/samba/secure
The chmod 0775 ensures the owner and group have full permissions, while others have read and execute access.
Creating Samba Passwords
Samba maintains its own password database, separate from the system's shadow passwords. You need to add your Linux user to this database:
sudo smbpasswd -a sambauser
You will be prompted to enter a password for sambauser. This password should ideally match the system password you set earlier, but it's not strictly required. This is the password clients will use to connect.
Restarting Samba
Restart Samba again to apply the new configuration:
sudo systemctl restart smbd
Accessing Shares from a Linux Client
On your client Linux machine, you can access Samba shares using the smbclient command or by mounting them.
Using smbclient
To list shares on the server:
smbclient -L //SERVER_IP_ADDRESS
Replace SERVER_IP_ADDRESS with the IP address of your Samba server. You might be prompted for credentials if the server requires them for browsing.
To connect to the guest share:
smbclient //SERVER_IP_ADDRESS/guest -N
The -N flag tells smbclient not to prompt for a password, connecting as a guest.
To connect to the authenticated share:
smbclient //SERVER_IP_ADDRESS/secure -U sambauser
You will be prompted for the password for sambauser. Once connected, you can use commands like ls, put, and get.
Mounting Shares
You can also mount Samba shares to your client's filesystem, making them appear as local directories.
First, install the necessary package on the client:
sudo apt install cifs-utils
Create a mount point:
sudo mkdir /mnt/sambashare
To mount the guest share:
sudo mount -t cifs //SERVER_IP_ADDRESS/guest /mnt/sambashare -o guest
To mount the authenticated share:
sudo mount -t cifs //SERVER_IP_ADDRESS/secure /mnt/sambashare -o username=sambauser,password=YOUR_PASSWORD
Replace YOUR_PASSWORD with the actual password for sambauser. For security, it's better to store credentials in a separate credentials file and reference that file using the credentials=/path/to/credentials/file option in the mount command, rather than typing the password directly.
To unmount a share:
sudo umount /mnt/sambashare
Troubleshooting Common Issues
One common issue is firewall blocking. Ensure that Samba ports (TCP 139 and 445, UDP 137 and 138) are open on the server's firewall. If using ufw on Debian/Ubuntu:
sudo ufw allow samba
Another frequent problem is incorrect permissions. Double-check both the Linux filesystem permissions on the shared directory and the Samba configuration settings (writeable, read only, create mask, directory mask).
If you encounter authentication errors, verify that the user exists in the Samba password database using sudo pdbedit -L and that the password was set correctly with smbpasswd.
Conclusion
Samba provides a robust solution for cross-platform file sharing. Whether you need a simple, open guest share for quick file transfers or a secure, authenticated share for sensitive data, Samba's configuration options accommodate both scenarios. By understanding the configuration file directives and Linux filesystem permissions, you can establish reliable and efficient network file access between your Linux and Windows systems.